Qt 프로그래밍을 정리와 함께 공부하는 용도로 제작하였습니다.
Qt Creator에서 Opencv를 사용하기 위해 정리해보겠습니다.
*** 수정 내용 : mingw730_64 -> mingw730_32로 변경 사진과 다름 ***
1. OpenCv Install
https://sourceforge.net/projects/opencvlibrary/files/4.5.4/opencv-4.5.4-vc14_vc15.exe/download
위 경로에서 OpenCV -4.5.4버전을 다운받았습니다.

Windows

2. CMake Install
Download | CMake
Current development distribution Each night binaries are created as part of the testing process. Other than passing all of the tests in CMake, this version of CMake should not be expected to work in a production environment. It is being produced so that us
cmake.org

너무 최신버전은 각종 호환성에 문제가 있을 수 있어 옛날 버전으로 다운받았습니다.
3. 환경변수 편집 ( Qt Install과 동일 )


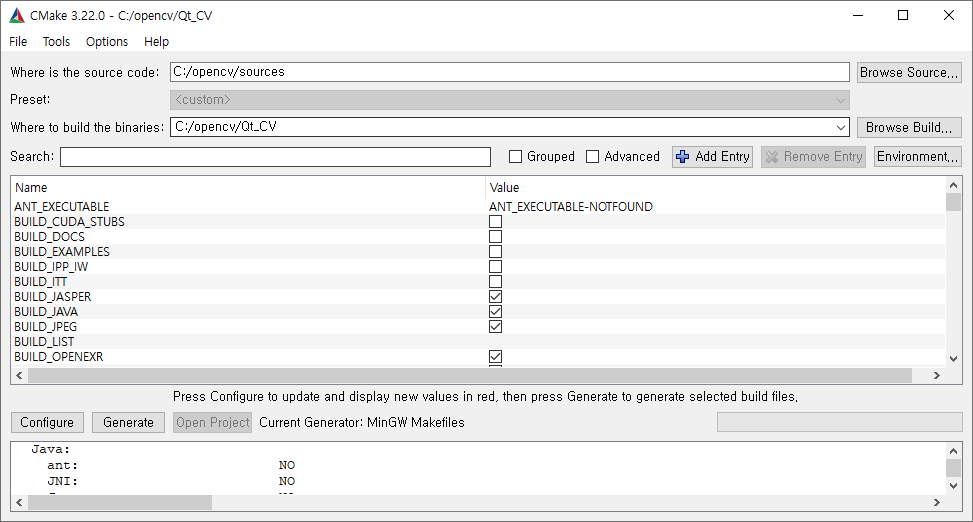
4. CMake 설정

source code의 경로와 binaries 경로를 지정해준다.
binaries는 빌드 폴더
Configure 클릭
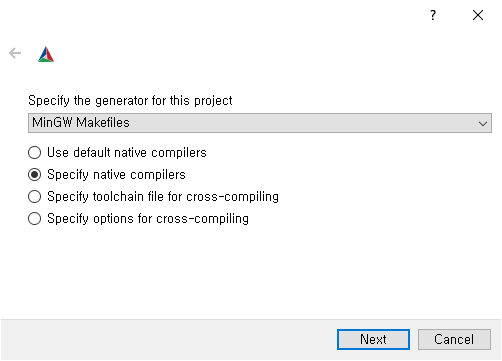
Next

C
C:/Qt/Qt5.12.6/Tools/mingw730_32/bin/gcc.exe
C++
C:/Qt/Qt5.12.6/Tools/mingw730_32/bin/g++.exe
Finish

기다리고 나면
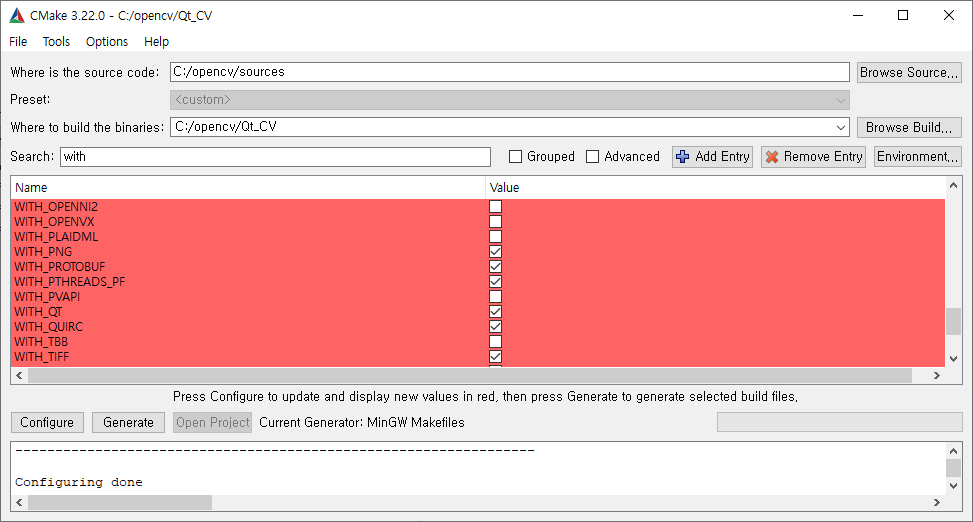
여기서 WITH_QT
WITH_OPENGL 체크해주기
Configure
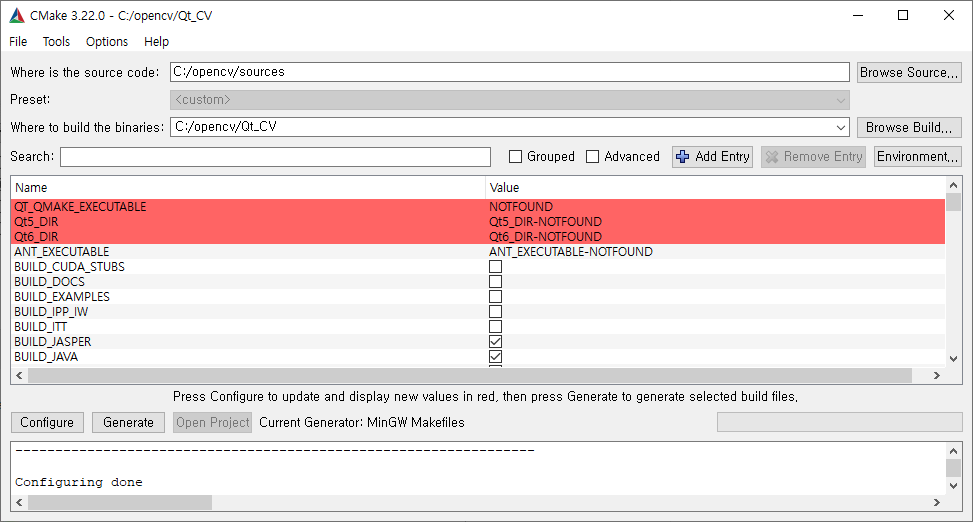
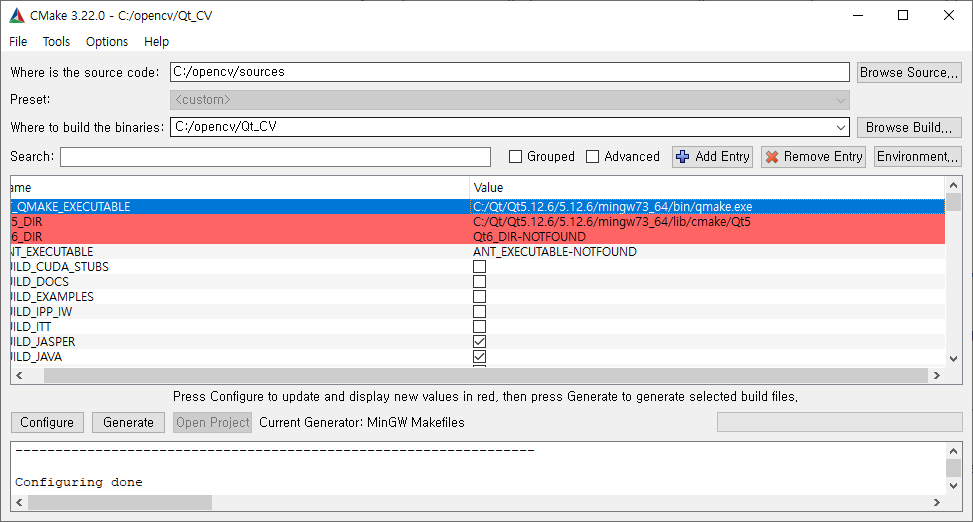
QMAKE_EXECUTABLE : C:/Qt/Qt5.12.6/5.12.6/mingw73_32/bin/qmake.exe
Qt5_DIR : C:/Qt/Qt5.12.6/5.12.6/mingw73_32/lib/cmake/Qt5
경로 설정 해주기
Qt6_DIR은 Qt6를 사용하지 않기 때문에 건들이지 않는다. ( Value 값 그대로 )
구글링해도 잘 안나와서 GPT로 물어봤더니 이렇게 알려주었다.
Configure
Qt5Concurrent_DIR
Qt5Core_DIR
Qt5Gui_DIR
Qt5OpenGL_DIR
Qt5Test_DIR
Qt5Widgets_DIR
새로 생성된 부분 경로 확인하고 (수정 x)
Configure -> Generate
cmd : cd C:\opencv\Qt_CV\mingw32-make -j 4
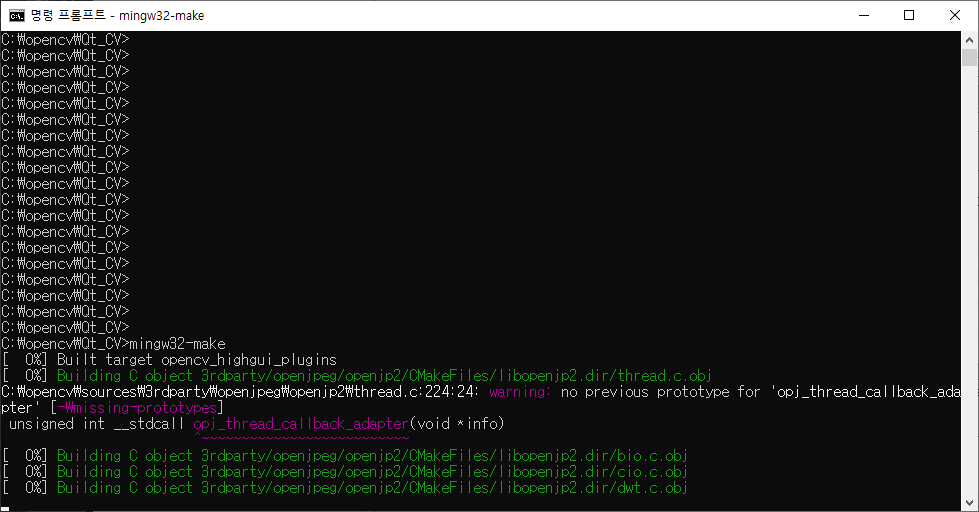
100%까지 채워졌으면 이제 설치합니다.
mingw32-make install

그 후 환경 변수 편집에
C:\opencv\Qt_CV\install\x64\mingw\bin
를 추가합니다.
'Qt_C++' 카테고리의 다른 글
| Qt_C++ : 개발환경 설정하기 (0) | 2023.03.16 |
|---|---|
| Qt_C++ : Qt 설치하기 (0) | 2023.03.16 |

